SKU: 11016253302
succulent plant centerpiece ideas

succulent plant centerpiece ideas 6

Sale price$22.38 Regular price$24.87
Save 10%

Pay in installments of $6.22 with ShopPay, AfterPay and Klarna

Shipping Estimate
USA
  • USA
  • CAN

Ships within 48 hours · Estimated delivery Jul 21 - Jul 26

Promo Codes Available:

For Your Every Summer RSVP, with Code: SUMMER15

Description

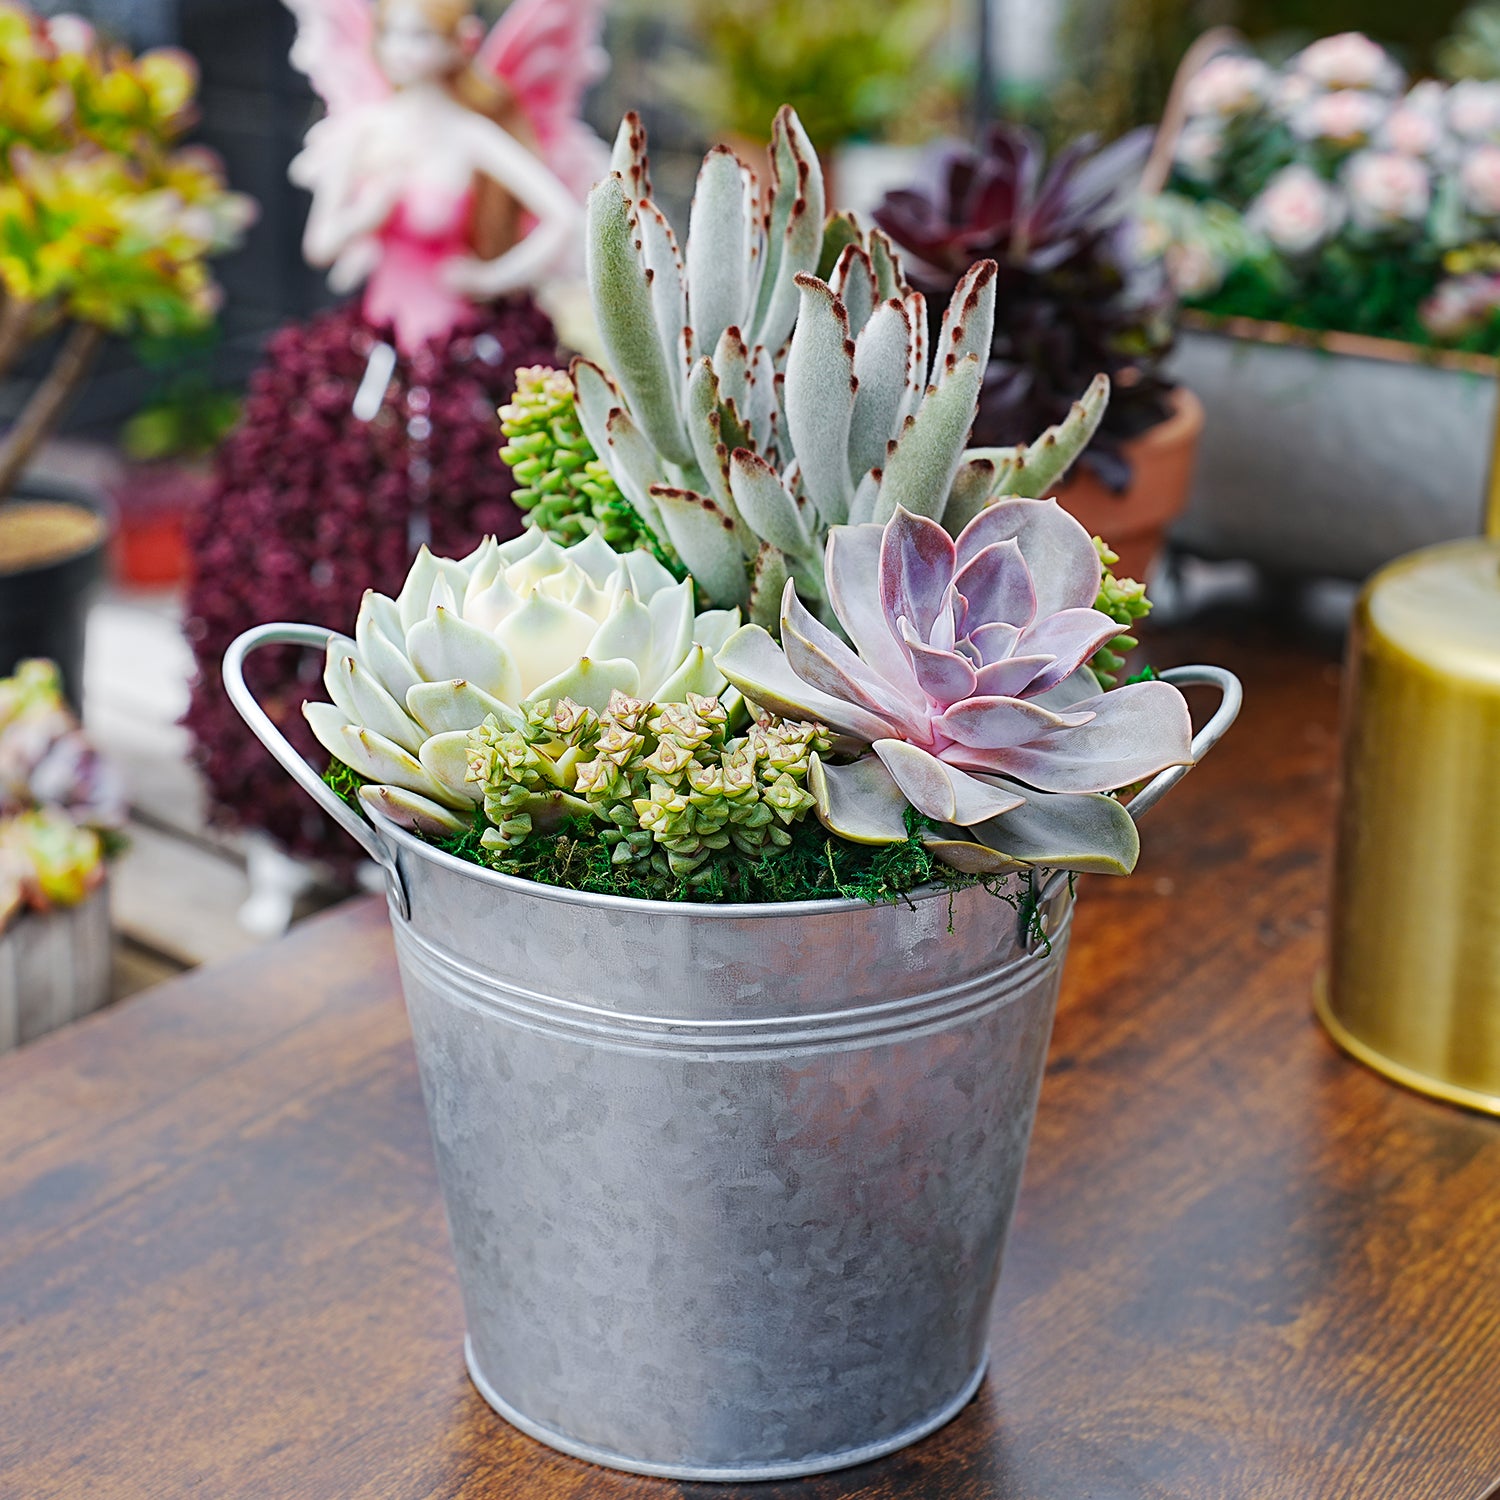
succulent plant centerpiece ideas 6The bucket succulent centerpiece featuring a galvanized planter that exudes a vintage and natural charm. Its rustic appeal complements French and farmhouse interior styles seamlessly. The metal barrel comes equipped with two handles, allowing you to effortlessly relocate your succulent arrangement to various spaces such as dining tables, side tables, porches, or gardens. The open design provides the flexibility to incorporate seasonal elements, making

The bucket succulent centerpiece featuring a galvanized planter that exudes a vintage and natural charm. Its rustic appeal complements French and farmhouse interior styles seamlessly. The metal barrel comes equipped with two handles, allowing you to effortlessly relocate your succulent arrangement to various spaces such as dining tables, side tables, porches, or gardens. The open design provides the flexibility to incorporate seasonal elements, making it a delightful addition for holidays like Christmas, Thanksgiving, Valentine's Day, and more.

Caring for Your Succulent Arrangement

Watering: This succulent arrangement without drainage holes at the bottom, so watering requires special attention. Pouring a large amount of water may lead to excess moisture accumulation, posing the risk of root rot for the succulent plants. Therefore, we recommend using a squeeze bottle for watering. Moss has water retention properties, so you don't need to water every day. Check the condition of the succulents once a week. When the bottom leaves start to soften and wrinkle, it indicates a need for water. When watering, focus near the base of each succulent, evenly watering 2-3 rounds

Lighting: All succulent plants require light to maintain their shape and color. It is recommended to place the succulent arrangement on a bright tabletop with diffused light, preferably with indirect sunlight. However, these light conditions may not be sufficient to preserve the color of the succulents. For optimal color maintenance, it is advisable to periodically expose them to direct sunlight outdoors for about a week (avoid doing so in summer and winter). If you are concerned about an empty tabletop, we suggest creating two succulent arrangements for rotation.

Temperature: Most succulents can tolerate temperatures between 40-95°F. During winter, it's best to bring outdoor succulent arrangements indoors.

Pruning: The key to keeping your succulent arrangement in perfect shape is regular trimming and replacement of plants. Trimming involves removing dried leaves from the base of the succulents and beheading elongated ones to maintain the plant's shape. If some succulents are beyond recovery, replace them with new ones. When the succulent arrangement becomes too crowded, you can also remove some plants and place them in separate pots.

Creating Your Succulent Arrangement

The square planter shape makes assembling this succulent arrangement a breeze. Follow the steps below to make your succulent arrangement:

1. Add soil to the container to 2/3 full.

2. Plant the big-sized plant in the center.

3. Add soil constantly while planting.

4. Plant the small-sized plants around the big plants.

5. Cover the gap with the moss.

6. Decorate the table with your own work!

More Information

Item includes: A planter; several succulents; ans moss for decoration
Planter Size: 5.9'' (L) * 5.9'' (W) * 5.9'' (H)
Planter Material: Pine
Plants: Various sizes of live succulents
Note: DIY succulent arrangement. If you choose planter + plants, you will receive the pot and plants separately. You will need to assemble the arrangement yourself. Succulent soil must be purchased separately.

Shipping Notes
  • Free Standard Shipping on $100+ Orders to the USA.
  • Except Preorder products are shipped in 48 hours.
  • Delivery to the USA:
  1. Standard Shipping : 3-10 business days
  • If time is of the essence, please consider selecting expedited delivery for faster service.
Exchange/Return Notes
  • We offer a 30-day return/exchange service after receiving.
  • Final sale items are not eligible for returns or exchanges.
  • To process your return/exchange, please contact us at [email protected]
  • Please click here for more details>>> Return & Exchange Policy
SKU: 11016253302

Discover Niche Categories That Outsell succulent plant centerpiece ideas

Top-Converting Item to Boost Your Average Order

4.6 ★★★★★
Based on 9 reviews
Sort
Highest Rating
Newest First
Oldest First
Product Reviews
C
Verified Purchase
Christina Mellies
Grantham, US
★★★★★ 5
Poli Glow used on bottom portion of the picture
Just put it on 21 foot RV, was impressed with the shine. Key is to make sure the applicator is moist. I periodically dampen with water. Realizing it wasn't going to revive the stickers. Question is How long it will last? What will it look like after it rains? Pictures attached, bottom portion was done with poli glow on June 7,2026 and I have just under a half of bottle left. Maybe I will update once it rains or how long the shine last.
WAS THIS REVIEW HELPFUL?YesReportShare
Reviewed in the United States on June 8, 2026
D
Verified Purchase
Diego
Waukegan, US
★★★★★ 5
It works miracles
I was amazed by the incredible difference it made on my RV. Check the pictures. The difference is of such a magnitude that we were amazed by the final results. Brought my rig back to life
WAS THIS REVIEW HELPFUL?YesReportShare
Reviewed in the United States on December 1, 2025
A
Verified Purchase
Amy Biggs
Cuba, US
★★★★★ 5
40 Years Young and Ready to Bring My RV Back to Life!
As a happy 40-year-old guy who takes a lot of pride in his RV, I’ve been on a mission to remove all the oxidation and restore that clean, glossy finish. After doing my homework, I decided to try Poli Glow Boat & RV Restoration, and I couldn’t be more excited about the results so far. I honestly can’t wait to see what it looks like once I’m completely finished. The quality of this product really stands out. It doesn’t feel like some quick temporary fix — it’s clearly made to properly restore fiberglass surfaces. The application use is straightforward, especially if you follow the prep steps carefully. Once I got into the rhythm of it, the process felt manageable and even kind of satisfying. What impressed me most was the smoothness it brought back to the surface. Areas that were dull and chalky from oxidation are starting to look deep and refreshed again. It’s doing a solid job with light scratch removal too, especially the small surface marks that naturally build up over time. I also appreciate the added layer of durability it promises. After putting in the work, I want something that’s going to last and protect the finish moving forward. And for anyone dealing with minor staining or corrosion spots, it definitely helps improve the overall look, contributing to better rust removal results around metal fixtures and trim. If you’re like me and want your RV looking proud and road-ready again, this feels like a serious step in the right direction. I’m genuinely excited to see the full transformation once I finish the entire exterior. Definitely worth the effort.
WAS THIS REVIEW HELPFUL?YesReportShare
Reviewed in the United States on February 19, 2026
A
Verified Purchase
Amazon Customer
Belleville, US
★★★★★ 5
Great product, great support, looks better than new!
I couldn't possibly be more pleased with how my RV looks after Poli-Glow! I have a 2018 Rockwood 21' RV trailer that had not been treated before, so there was oxidation / fading from being in the Arizona sun - it just looked dull (the color is mostly beige). I am not usually a DIY'er. I researched options online and really appreciated the educational videos on Poli-Glow so I went with that. I don't have buffer machine or anything like that so I liked the idea of being able to do everything by hand. (Even if I had a buffing machine, I think that would have been more tiring having to climb a ladder with it and holding it over my head while applying a traditional wax - plus having to change between it and buffing cloths before wax would dry). Plus I like that this is a longer lasting treatment than a traditional wax. You will need some time - I spread my project over 4 days (day 1 - cleaning the RV and separate UV protection of the roof and awning; day 2 - Poli-Prep the whole RV; day 3 and day 4 Poli-Glow half the RV day 3 and finish day 4). Doing the Poli-Prep was easy. I mixed it in a spray bottle. I hosed down the section of the RV I was getting ready to scrub, sprayed on the Poli-Prep, scrubbed the area with the scrub brush that came with the kit, then hosed the area down and let it air dry. I only used about a third of the bottle of Poli-Prep. After the Poli-Prep the RV looked better than it did before, but that's not where the real shine comes from. I appled Poli-Glow to the RV surface, over the decals, plus all the black trim areas. The coats dried quickly so I didn't have any extra downtime between coats. When I finished a coat I walked about 30 feet to my working station in the shade, added more Poli-Glow to the mitt, and by the time I got back to the RV the previous coat was dry and ready for the next coat. Overall I worked a side of the RV from left to right; within a section I started on the bottom section up to almost as high as I could reach and used a ladder for the top half. The first coat get absorbed pretty thoroughly so the area looks only partially polished; by the 2nd - 3rd coat the shine really starts to show. Since I am in AZ, I applied the recommended 10 coats of Poli-Glow (10 coats to about a 5 to 6 foot section, then move the ladder to the next section). Overall I used 2 bottles of Poli-Glow with about a half inch left in the bottle. I did time my efforts both days to work on sections that weren't in the direct sun, making sure the area I would work on was cool or warm, not hot. Support was SUPER-FANTASTIC! I sent questions via Amazon contact seller and received very fast responses. They also sent me an email link to other videos from a detailer, so by the time I started I was confident and ready. During the project I sent pictures and they provided fast feedback that I was in fact progressing very well - very encouraging and confidence boosting. Thank you Sean! So yes, it took some time, but it was so worth it! It is shiny and beautiful and looks like new (actually better than new)! My neighbor has already asked me about it so he can do his RV. After I was done I took my victory lap - I sat in my driveway staring at it while sipping a beer, basking in the reflection of the sunset mirroring off the RV!
WAS THIS REVIEW HELPFUL?YesReportShare
Reviewed in the United States on March 13, 2026
C
Verified Purchase
Cindy
Lexington, US
★★★★★ 5
Oxidized fiberglass RV looks new again!
WOW! I researched high and low for a product that would bring back the shine to our 10 year old travel trailer that has fiberglass panel siding. There were countless videos watched, numerous products tried without success and then I discovered PoliGlow Restoration Fiberglass Kit for boats and RVs. It came with the cleaner and pad to remove the oxidation and a bottle of Superior Fiberglass Restoration, Protection and Shine. This product is amazing. The condition on the exterior of our RV had become a bit embarrassing, but now it shines with the newest of them. The instructions are easy to follow, there are even videos of the process! It does require several coats of the Restoration and Shine product. The cost is extremely reasonable for the end result of the RV. The shine is amazing! Highly recommend this product. PS It was extremely easy to apply as I had my husband do it, he didn’t complain at all and was thrilled with the result!
WAS THIS REVIEW HELPFUL?YesReportShare
Reviewed in the United States on July 24, 2025

recommand products